
Key Takeaways
-
Asphalt millings are a cost-effective and durable solution for driveway paving, costing significantly less than new asphalt.
-
Proper site preparation, including clearing and compacting the soil, is crucial for a successful installation.
-
Essential tools for DIY asphalt milling include a milling machine, compactor, and basic hand tools.
-
Regular maintenance, such as re-compaction and sealcoating, extends the life of an asphalt millings driveway.
-
Asphalt millings are environmentally friendly, as they recycle old pavement materials.
DIY Asphalt Milling for Driveways on a Budget
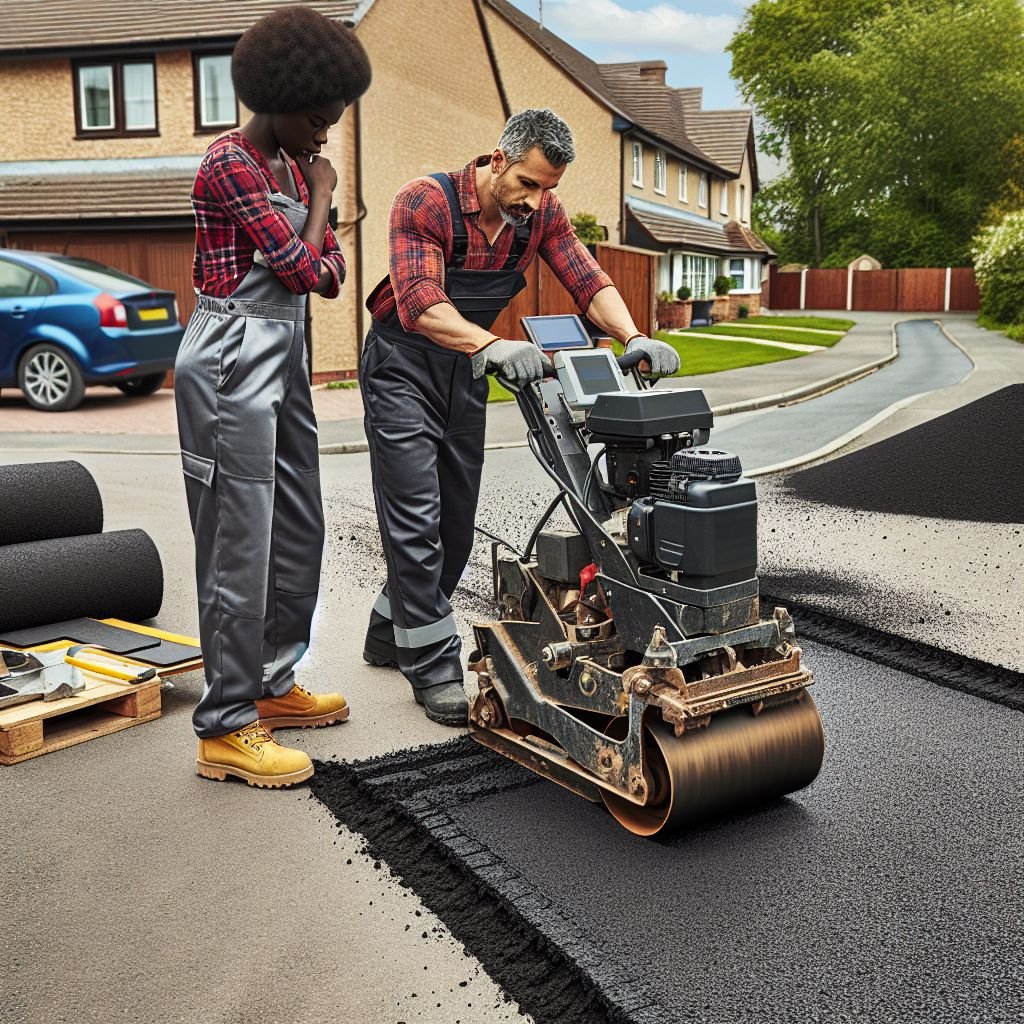
Looking to upgrade your driveway without breaking the bank? Asphalt millings might just be your answer. These recycled materials offer a budget-friendly, durable, and environmentally conscious alternative to traditional asphalt. Let me walk you through everything you need to know to tackle this project yourself.
Affordable Driveway Solutions Using Asphalt Millings
One of the biggest advantages of using asphalt millings is the cost savings. New asphalt can be expensive, but millings, which are essentially recycled asphalt, can be up to 50% cheaper. This makes it an attractive option for homeowners looking to save money while still achieving a high-quality driveway.
Besides that, asphalt millings are incredibly durable. When properly installed, they can last for decades, providing a solid and stable surface that can withstand the elements and heavy traffic. This longevity makes the initial investment even more worthwhile.
The Benefits of Choosing Asphalt Millings
Choosing asphalt millings comes with several benefits:
-
Cost-Efficiency: As mentioned earlier, millings are much cheaper than new asphalt.
-
Durability: They provide a long-lasting surface that can handle heavy use.
-
Environmental Impact: By recycling old asphalt, you’re reducing waste and promoting sustainability.
-
Low Maintenance: Once installed, asphalt millings require minimal upkeep compared to other materials.
Tools and Equipment Needed for DIY Asphalt Milling
Before you start, you’ll need to gather some essential tools and equipment:
Additionally, consider the eco-friendly recycling practices to further reduce your environmental impact.
-
Milling Machine: This is used to grind up old asphalt into millings.
-
Compactor: A heavy-duty roller or plate compactor is necessary to compress the millings into a solid surface.
-
Hand Tools: Shovels, rakes, and wheelbarrows will help you spread and level the millings.
-
Sealcoating Supplies: To extend the life of your driveway, you’ll need materials for sealcoating.
Steps to Prepare Your Driveway for Asphalt Milling
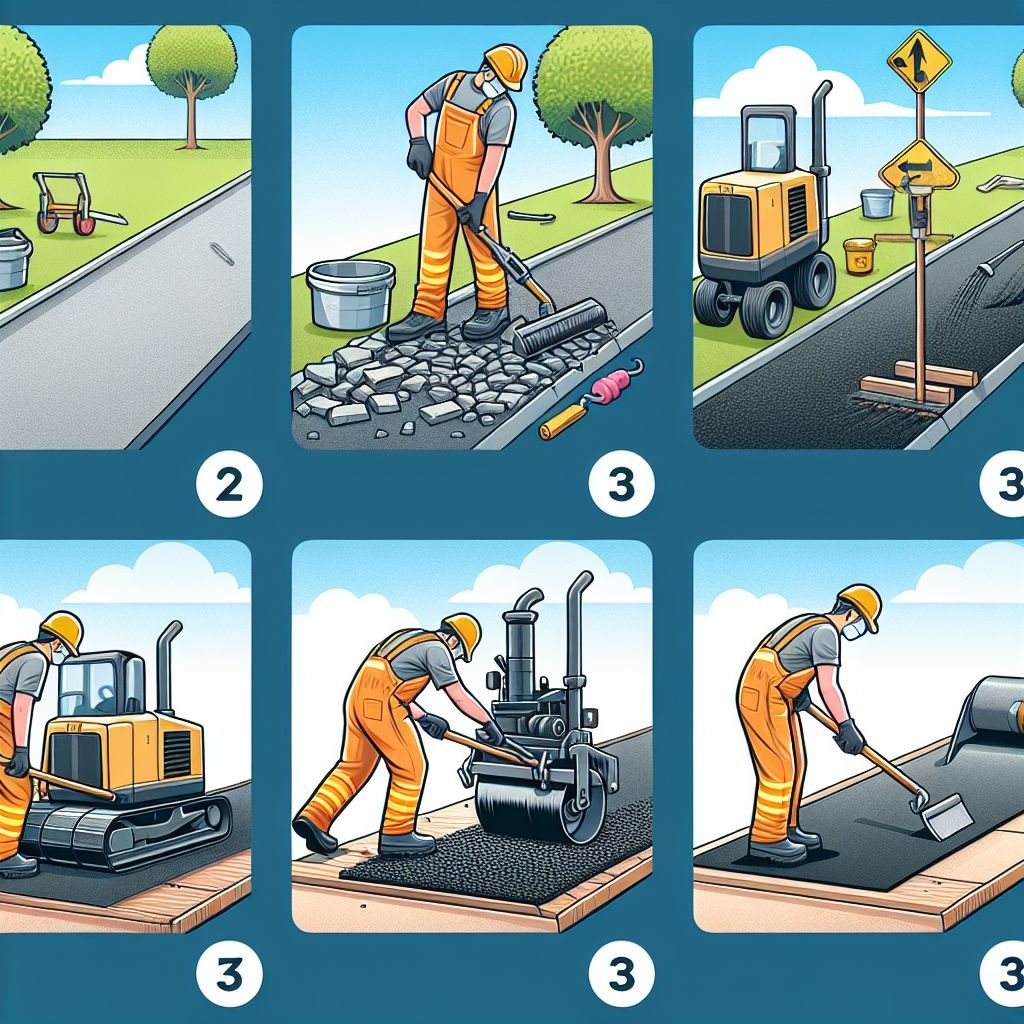
Preparation is key to a successful asphalt milling driveway. Here’s how to get your site ready:
Clearing and Excavating the Site
First, you’ll need to clear the area of any debris, vegetation, or old pavement. This ensures a clean surface for the new millings to adhere to. Use a shovel and rake to remove any loose materials and create a smooth base.
Soil Compaction Techniques
Next, you’ll want to compact the soil. This step is crucial for creating a stable foundation. Use a plate compactor or a heavy-duty roller to compress the soil until it’s firm and level. Proper compaction prevents the driveway from shifting or settling over time.
Choosing the Right Depth for Milling
The depth of your milling will depend on the condition of your existing surface and the amount of traffic your driveway will endure. Generally, a depth of 2-4 inches is recommended for residential driveways. This provides enough material to create a durable surface without being too thick.
Ensuring Proper Drainage and Slope
Proper drainage and slope are crucial to the longevity and performance of your asphalt millings driveway. Without these, water can pool on the surface, leading to erosion and weakening the structure over time. Let’s dive into how you can ensure your driveway is set up for success.
Water management is a critical aspect of any driveway project. By designing an effective drainage system and creating a slight slope, you can prevent water from damaging your new driveway.
Designing an Effective Drainage System
To start, you need to design a drainage system that will efficiently direct water away from your driveway. Here are some steps to follow:
-
Install French Drains: These are trenches filled with gravel and a perforated pipe that help redirect water away from the driveway.
-
Create Swales: Swales are shallow ditches that can be lined with grass or rocks to guide water away from the surface.
-
Ensure Proper Grading: The ground should be graded so that water flows naturally away from the driveway.
Creating a Slight Slope for Water Diversion
In addition to a drainage system, your driveway should have a slight slope to encourage water to run off rather than pool. A slope of about 2% (or 1/4 inch per foot) is typically sufficient.
To achieve this, follow these steps:
-
Measure the Slope: Use a level and measuring tape to ensure the correct slope is maintained throughout the driveway.
-
Grade the Surface: Use a rake and shovel to adjust the height of the soil, creating a gentle incline.
-
Compact the Graded Soil: Once the slope is set, compact the soil to create a firm base.
Maintenance Tips for a Long-lasting Asphalt Millings Driveway
Maintaining your asphalt millings driveway is essential to keeping it in good condition. Regular inspections and timely repairs can prevent minor issues from becoming major problems.
Regular Inspections and Repairs
Conducting regular inspections allows you to catch potential issues early. Look for signs of erosion, potholes, or cracks. Address these problems promptly to prevent them from worsening.
Here’s a simple inspection checklist for asphalt millings driveways:
-
Check for standing water after rainstorms.
-
Look for cracks or potholes forming on the surface.
-
Inspect the edges for signs of erosion or wear.
Re-compaction Techniques
Over time, the surface of your driveway may become loose or uneven. Re-compaction can help maintain a smooth and stable surface. Use a plate compactor or heavy-duty roller to compress the millings periodically.
“Re-compaction is especially important after winter months, as freeze-thaw cycles can cause the material to shift and loosen.”
Sealcoating to Extend Driveway Life
Sealcoating adds an extra layer of protection to your driveway, helping to prevent damage from water, UV rays, and chemicals. Applying a sealcoat every 2-3 years can significantly extend the life of your asphalt millings driveway.
Here’s how to do it:
-
Clean the Surface: Remove any debris or dirt from the driveway.
-
Apply the Sealcoat: Use a brush or squeegee to spread the sealcoat evenly over the surface.
-
Allow to Dry: Let the sealcoat dry completely before using the driveway.
Creative Uses of Asphalt Millings Beyond Driveways

Asphalt millings are not just for driveways. They have a variety of other applications that can help you save money and make the most of this versatile material. Learn more about eco-friendly recycling and green practices that can be applied to asphalt millings.
Foundation Layers for New Roadways
Asphalt millings can be used as a base layer for new roads. They provide a stable foundation that can support the weight of new pavement. This can be a cost-effective way to build roads without the expense of new materials.
Erosion Control in Landscaped Areas
In landscaped areas, asphalt millings can help control erosion. They can be used to create pathways or borders that prevent soil from washing away during heavy rains.
Constructing Parking Lots and Pathways
Parking lots and pathways are other great uses for asphalt millings. They provide a durable and cost-effective surface that can handle vehicle and foot traffic. Plus, they can be installed quickly and easily.
By considering these alternative uses, you can maximize the value of asphalt millings and find new ways to save money on your home improvement projects.
Ensuring Proper Drainage and Slope
Proper drainage and slope are crucial to the longevity and performance of your asphalt millings driveway. Without these, water can pool on the surface, leading to erosion and weakening the structure over time. Let’s dive into how you can ensure your driveway is set up for success by understanding top soil preservation techniques.
Water management is a critical aspect of any driveway project. By designing an effective drainage system and creating a slight slope, you can prevent water from damaging your new driveway. For more information on eco-friendly practices, check out eco-friendly recycling in Arizona.
Designing an Effective Drainage System
To start, you need to design a drainage system that will efficiently direct water away from your driveway. Here are some steps to follow:
-
Install French Drains: These are trenches filled with gravel and a perforated pipe that help redirect water away from the driveway.
-
Create Swales: Swales are shallow ditches that can be lined with grass or rocks to guide water away from the surface.
-
Ensure Proper Grading: The ground should be graded so that water flows naturally away from the driveway.
Creating a Slight Slope for Water Diversion
In addition to a drainage system, your driveway should have a slight slope to encourage water to run off rather than pool. A slope of about 2% (or 1/4 inch per foot) is typically sufficient.
To achieve this, follow these steps:
-
Measure the Slope: Use a level and measuring tape to ensure the correct slope is maintained throughout the driveway.
-
Grade the Surface: Use a rake and shovel to adjust the height of the soil, creating a gentle incline.
-
Compact the Graded Soil: Once the slope is set, compact the soil to create a firm base.
Maintenance Tips for a Long-lasting Asphalt Millings Driveway
Maintaining your asphalt millings driveway is essential to keeping it in good condition. Regular inspections and timely repairs can prevent minor issues from becoming major problems.
Regular Inspections and Repairs
Conducting regular inspections allows you to catch potential issues early. Look for signs of erosion, potholes, or cracks. Address these problems promptly to prevent them from worsening.
Here’s a simple inspection checklist:
-
Check for standing water after rainstorms.
-
Look for cracks or potholes forming on the surface.
-
Inspect the edges for signs of erosion or wear.
Re-compaction Techniques
Over time, the surface of your driveway may become loose or uneven. Re-compaction can help maintain a smooth and stable surface. Use a plate compactor or heavy-duty roller to compress the millings periodically.
“Re-compaction is especially important after winter months, as freeze-thaw cycles can cause the material to shift and loosen.”
Sealcoating to Extend Driveway Life
Sealcoating adds an extra layer of protection to your driveway, helping to prevent damage from water, UV rays, and chemicals. Applying a sealcoat every 2-3 years can significantly extend the life of your asphalt millings driveway.
Here’s how to do it:
-
Clean the Surface: Remove any debris or dirt from the driveway.
-
Apply the Sealcoat: Use a brush or squeegee to spread the sealcoat evenly over the surface.
-
Allow to Dry: Let the sealcoat dry completely before using the driveway.
Creative Uses of Asphalt Millings Beyond Driveways
Asphalt millings are not just for driveways. They have a variety of other applications that can help you save money and make the most of this versatile material.
Foundation Layers for New Roadways
Asphalt millings can be used as a base layer for new roads. They provide a stable foundation that can support the weight of new pavement. This can be a cost-effective way to build roads without the expense of new materials.
Erosion Control in Landscaped Areas
In landscaped areas, asphalt millings can help control erosion. They can be used to create pathways or borders that prevent soil from washing away during heavy rains. For more on this topic, check out these top soil preservation techniques.
Constructing Parking Lots and Pathways
Parking lots and pathways are other great uses for asphalt millings. They provide a durable and cost-effective surface that can handle vehicle and foot traffic. Plus, they can be installed quickly and easily.
By considering these alternative uses, you can maximize the value of asphalt millings and find new ways to save money on your home improvement projects.
Finding the Right Contractor for Assistance
Even if you’re tackling this project yourself, there might be times when you need professional help. Choosing the right contractor can make a significant difference in the quality and longevity of your driveway.
Qualities to Look for in a Contractor
When selecting a contractor, consider the following qualities:
-
Experience: Look for contractors with a proven track record in asphalt milling and driveway installation.
-
Licensing and Insurance: Ensure the contractor is properly licensed and insured to protect yourself from potential liabilities.
-
Reputation: Check online reviews and ask for references to gauge the contractor’s reputation.
Checking Credentials and Past Work
Always verify the credentials of any contractor you’re considering. Ask to see their license and insurance documents. Additionally, request a portfolio of their past work to assess the quality of their installations. For more information on this topic, check out The Ultimate Guide to Asphalt Millings.
Understanding Insurance and Warranties
Make sure the contractor offers a warranty on their work. This provides peace of mind, knowing that any issues will be addressed without additional costs. Also, verify that their insurance covers any potential damages or accidents that may occur during the project.
Summary
In summary, DIY asphalt milling for driveways is a cost-effective and durable solution that can significantly enhance your property. By understanding the benefits, preparing the site properly, and maintaining the driveway, you can ensure a long-lasting and visually appealing result.
Key Points to Remember
Here are the key points to keep in mind:
-
Asphalt millings are an affordable and durable option for driveways.
-
Proper site preparation, including clearing, compacting, and grading, is essential.
-
Regular maintenance, such as inspections, re-compaction, and sealcoating, extends the life of the driveway.
-
Asphalt millings have versatile uses beyond driveways, including erosion control and foundation layers.
-
Choosing the right contractor ensures a high-quality installation and peace of mind.
Final Thoughts on DIY Asphalt Milling
Taking on a DIY asphalt milling project can be a rewarding experience. Not only do you save money, but you also gain the satisfaction of completing a significant home improvement project. With the right preparation, tools, and maintenance, your asphalt millings driveway will serve you well for years to come.
Frequently Asked Questions
Is asphalt millings good for a driveway?
Yes, asphalt millings are an excellent choice for driveways. They are cost-effective, durable, and environmentally friendly. When properly installed and maintained, they can last for decades.
How do I maintain an asphalt millings driveway?
Regular maintenance includes inspecting for cracks or erosion, re-compacting the surface as needed, and applying a sealcoat every 2-3 years. These steps help extend the life and appearance of your driveway.
What equipment is needed for asphalt milling?
You’ll need a milling machine to grind up old asphalt, a compactor to compress the millings, and basic hand tools like shovels and rakes. Sealcoating supplies are also necessary for long-term maintenance.
Can asphalt millings be used for other projects?
Yes, asphalt millings are versatile and can be used for various projects such as creating foundation layers for new roads, controlling erosion in landscaped areas, and constructing parking lots and pathways. Learn more about eco-friendly recycling practices that can complement the use of asphalt millings.
How long does an asphalt millings driveway last?
With proper installation and maintenance, an asphalt millings driveway can last between 20 to 30 years. Regular upkeep, such as re-compaction and sealcoating, helps ensure its longevity.